Working on your Project
During this time period, you will be working on your approved project. If you run into complications, be sure to check your various resources for helpful suggestions
- P5 reference page.
- P5.play reference and examples pages.
- Tone.js reference and examples pages.
- The chapters and resources page of this website.
- Ask your instructor for help.
As you go along through your project, the need for various changes and revisions will likely arise. Small changes are fine, but anything large should be brought to your instructor’s attention.
Building your Arduino Integration
Remember that your project must include a two-way integration with the Arduino board. This means that:
- interactions with the physical circuit will cause a change in the p5 program, and
- changes in the p5 program will change an aspect of the physical circuit.
Below is a recommended starting setup for the Arduino board.
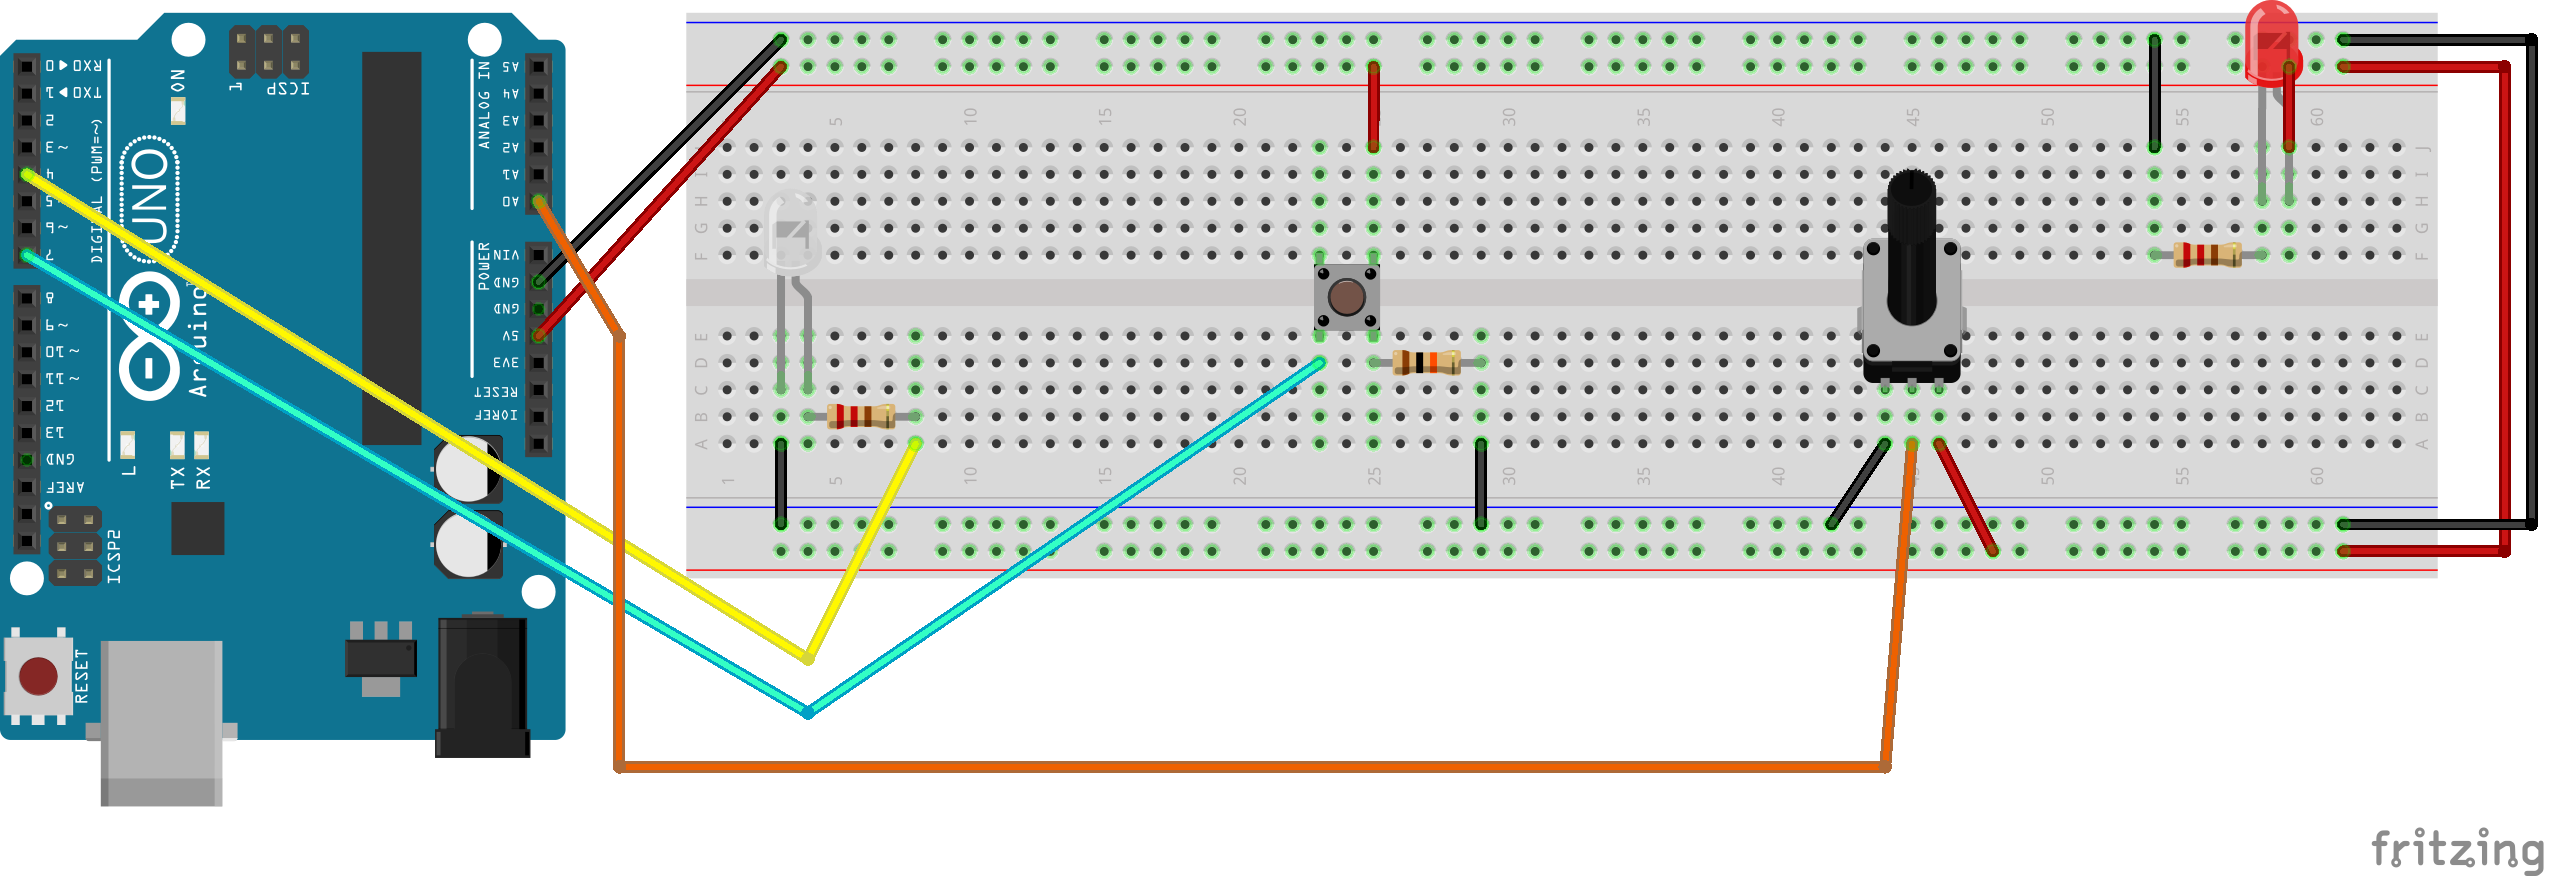
Notice a few helpful things included in this setup:
- A (in this case) red LED that will only light up when the board is receiving power.
- A (in this case) white LED that can can be turned off and on via an arduino pin.
- A push button that can be used to send a digital signal.
- A potentiometer that can be used to send an analog signal.
Keep in mind that this is just a starting template and any elements can be added, removed, or changed as needed for your project.
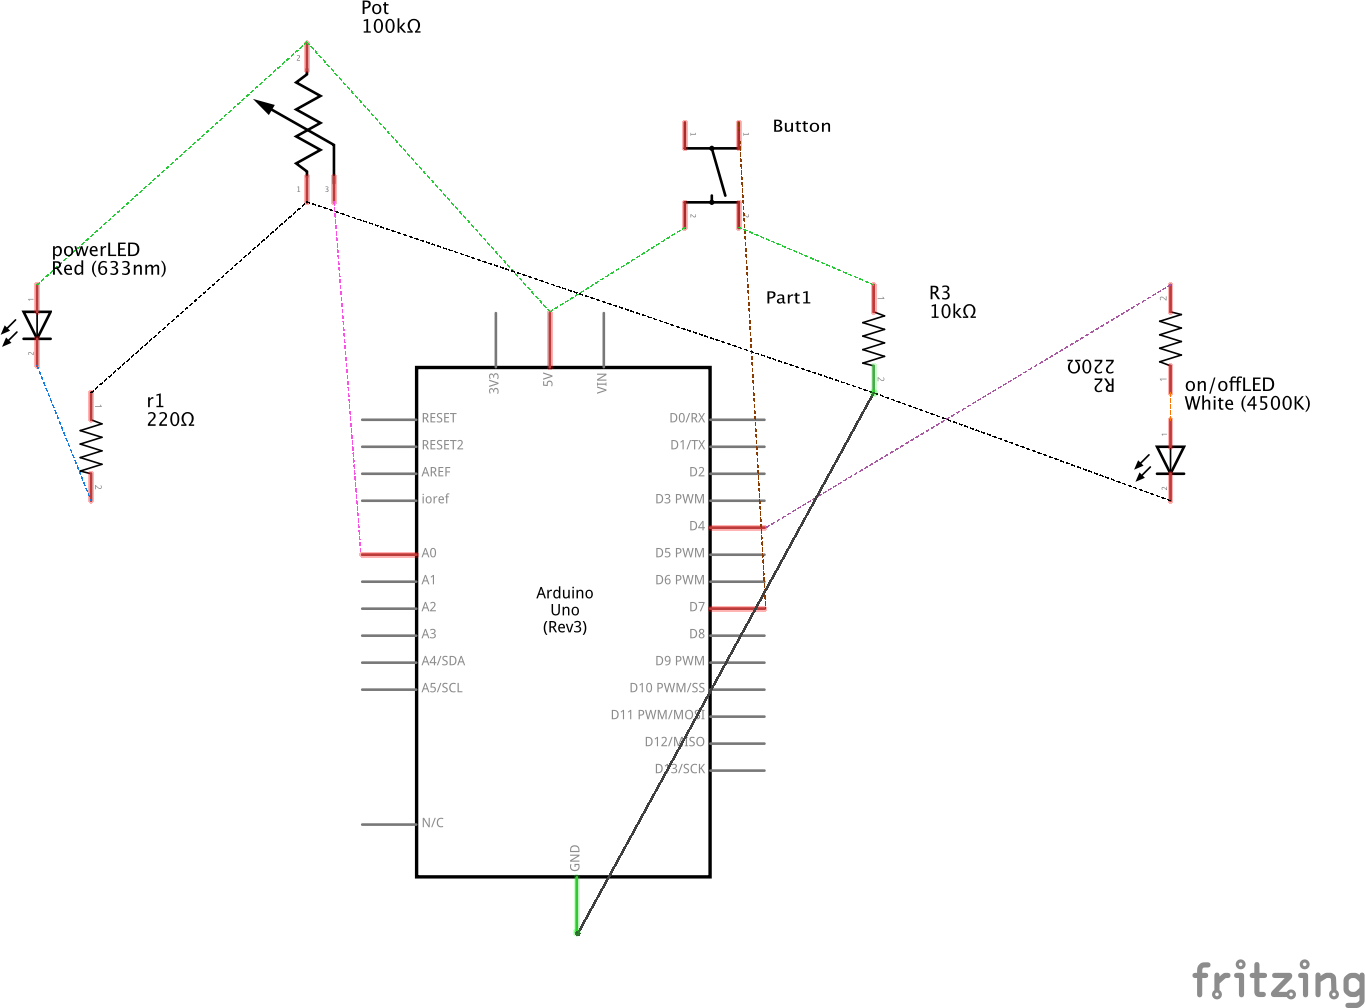
Below is a wire-frame schematic showing the same setup.
If time, budgets, materials, and experience allow, it may prove useful to create a hard-wired version of this setup by soldering materials to a blank printed circuit board. However, this is completely optional and should not be attempted by any students due tio the high temperature fo the soldering iron.
If possible, keep your final project materials separate so that you will not have to disassemble and reassemble your project every day.