Animations & Images
Adding files into a P5 project
The first thing we have to do before adding an image to our sprite is to include that image inside the brain of our p5 project. This can be done in two different ways, but the end result is identical: an image becomes hosted on the internet and p5 can find it in this sketch.
Looking at the example on the previous page, we can see the photoDirectory variable contains a string for a URL. This is the location on the internet where the photos are located. If your files are located on a specific server, you can provide a link to them and P5 will find the files and add them into your project. (more details later) If you use this method, you will need to store the URL as a string in a variable as shown on the previous page. This is useful because it will not take up any storage space in your p5 account, but can be problematic since someone will have to find a place to host the files and you will have to rely on them to make sure the files remain both online, and at the same location for your codes to work.
You can also add you own local images from your own device onto P5’s server in the steps detailed below.
- Open the file editor
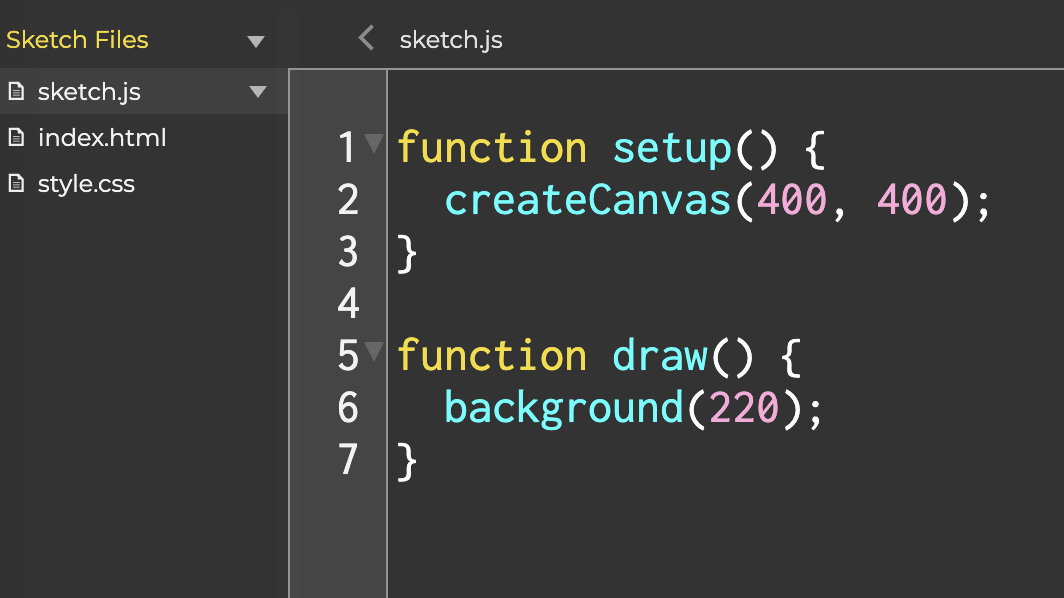
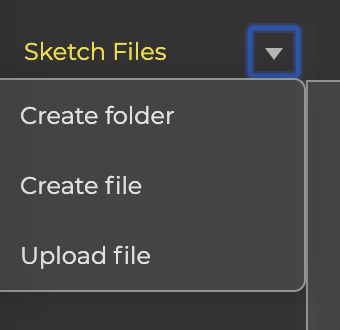
- Click on the arrow next to “Sketch Files” and select “Create Folder”
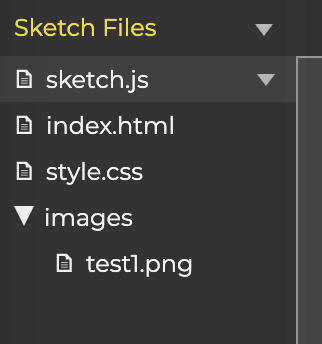
- Give this folder a name using the pop up window. For this example, we went with “images”. You will now see your folder appear inside of the file editor.
- Clock the small triangle next to your new folder and select “upload file”. You can then use the pop-up window to drag-and-drop your image, or manually upload it by searching your device.
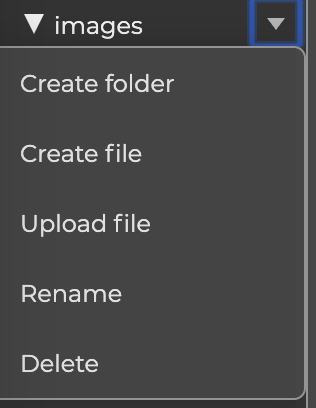
- You will now see the file inside your folder like in the image below. You can click the triangle by your file to rename it or delete it as needed.
- Open the file editor
The second method tends to be a little more stable than method 1 because if the server location changes at all in the previous method, P5 will be unable to locate the images and the project will break. The downside is that each P5 account has a limited amount of storage, so you will have to be careful not to use all of this space. This process works the same for images, sound files, and video files. You can delete these assets to free up space as needed under the My Account tab in the top right of the screen.
Let’s Practice!
Create a new sketch in p5 and try to load an image file into it. We will later use this sketch to add the image to a sprite.
Putting an image onto a sprite
Now that p5 knows where to find the image (either by uploading it or providing a url in a variable to use in this next step), you need to have the program load the image into your project. To do this, we need to call a new function: preload(). This function’s purpose is to load any external assets prior to the setup function. This will prevent the code from trying to perform a task with an asset that isn’t actually in the project yet. Not doing this in preload() will cause multiple errors.
To load an image, you first need a variable to store the image in your code. You then assign the variable the result of function loadImage(). The argument for this function is the file pathway to where you image is located on the internet. Using the examples from above, the line would look like this:
- Method 1: remotely hosted images:
let myImage;
let imageURL = "https://bit.ly/3qT1nBz";

function preload(){
    myImage = loadImage(imageURL);
}
- Method 2: loading images in the p5 sketch:
let myImage;

function preload(){
myImage = loadImage("images/test1.png");
}
In the case of method two, we first have to indicate the folder that the image is located in, then the image. We will need ot specify any sub-folders as well, marking each level with a /. If your image isn’t in a folder, then just typing loadImages("filename.extension"); would work. You also need to specify the extension of the file. using .jpeg or .png files are recommended for this unit.
For both methods of accessing files, you will need to type the image location as a string, regardless of it is a url or a local file that was added to the sketch.
Once you have loaded an image to a sprite, the sprite will automatically resize itself to match the dimensions of the image. This will automatically update whenever the image or animation changes so you don’t have to worry about that at all!
Let’s Practice!
Now we can use this image in our code. Try replacing the default value of 220 inside of the background() function with the name of your variable that is storing the image and see what happens.
To add the image to the sprite, first we must make a sprite. Then we can simply say sprite.addImage('label', files); like in the embedded code example example a little ways below.
If you want, you can use addAnimation() instead of addImage() here because addImage() is simply creating a single frame animation for the sprite. The arguments are the same for both functions.
You must give each animation a name/label so that you can refer to it whenever you need ot adjust a parameter of the animation or change it. You then have to tell P5 which image file(s) you want to use. See the embedded code in “Changing the image on a Sprite” for an example
Let’s Practice!
Follow the steps above to add the image to a sprite in the sketch from the previous practice.
Changing the image on a Sprite
To change the image on a sprite, it is fairly simple. First you must repeat the process of loading in each image that you want to use and adding it to the sprite with addImage() or addAnimation(). After you have loaded all of the desired images, you then have to set the default one with sprite.changeAnimation(label). This will allow the spite to have a default appearance, but will have all of the other images in its memory.
Next you will need to set up a condition that will tell your code when to change the image. For this example, We will change the image if the mouse is pressed via functions mousePressed() and mouseReleased(). (if() statements in the draw() function could also work for this). You can then use the .changeAnimation() method again to update the animation present on the sprite. The argument is the label given to the initial image/animation when it was added to the sprite in preload(). The example code below shows all of this in one spot.
See the Pen Example Code by LSU DDEM ( @lsuddem) on CodePen.
https://codepen.io/lsuddem/pen/GRpMdymAs a side note, be sure that you double check all of the images you want to utilize in your sketches. normal .jpg files will work for the backgrounds of sketches, but usually having a .png file with a transparent background will be more appropriate for a sprite or anything that will more. Notice the cat image in the above sketch. This one does not have the properly transparent background, which becomes obvious when the file is displayed on the sprite.
Let’s Practice!
The next step in our practice is to now add another image to our sketch and have out sprite change images. The trigger for this can be whatever you want, but will need to involve a conditional and the .changeAnimation() method. Try one or more of the following:
- changing based on the mouse or sprite location
- changing based on key inputs
- changing based on a timer
- changing based on colliding with another sprite
- changing when the sprite is clicked on
The images don’t necessarily have to be related. That is up to you.
Animating a sprite with multiple images
Once you can load an image onto a sprite with .addAnimation() or addImage(), you are close to making this a dynamic animation with multiple images. In order to do this, you will have to tell p5 to load all of the images needed in your project. This is where hosting the images on a separate server and using for loops, like in the example below, can save you a large amount of typing.
Once you have loaded all of your images into your project, the next step is to add them onto the sprite with the .addAnimation() method. Simply type out the name of the variables storing the images in the order that you want them to appear in your animation. (You can repeat images if needed) P5.play will then cycle through the images as the draw function repeats it’s loop. Don’t forget that you will need to give the animation a name as the method’s first argument, just like when loading a single image.
Here is an example of adding a looping animation to a sprite and coding for interactions from mouse and key presses:
See the Pen Example Code by LSU DDEM ( @lsuddem) on CodePen.
https://codepen.io/lsuddem/pen/ZRRoEGNotice how the images are loaded into an array using a for loop in order to keep them all in one place. You can then easily reference the array index to find a specific image. To achieve this, we first name the image files something similar. In this case they are all identical except for the number of the image. This number corresponds to the frame in the walking animation. From here, we can use the for loop’s repetition in order to automatically add all of the sprites into the sketch at once. Instead of having 10 different variables to hold all of the images, we just have a single array.
Later, in setup(), we can then specify each of the images in the order that we want by giving the array index for that image. Since the images were all loaded in order, this is easy to type out.
The last parts of this code have us set a frame delay on the animation. Normally the animation would progress one frame per iteration of the draw loop, but by increasing this value, we can slow down the animation to a speed that fits our needs. (in this case the image changes every 4 frames) This delay only applies to the single animation that we apply it to, and not the sprites or draw() function.
Everything else in this example code comes from the previous section on Sprite interactions. Be sure to check out those lessons and/or the p5.play reference pages if you need a refresher on this material.
Let’s Practice!
This is the final step for the practice in this lesson. You should already have a sketch with at least 2 images loaded into it, and a sprite. Use the steps above to add them as an animation on a single sprite. If you want, check out the resources page or someplace like Spriter’s Resource for some 2D image assets. (Keep in mind that some images on these sites may be restricted by copyright.)
You can check out this site’s resources page or ask your teacher for more places to find sprite images. Images with transparent backgrounds work the best for animations
Sprite Sheets
Generally, it is easier to create animations when the images are all separate files, but a lot of times artists will combine multiple frames onto one file in order to save space in a game. These files are called sprite sheets, and it is likely that you will come across them when looking for character sprites. To work with a sprite sheet, we can do the following:
There are methods for loading an interpreting a sprite sheet, however this section of the p5.play library is the most limited. You can use these to load in a sprite sheet, however you must know exactly how many pixels wide and tall each frame of the sheet is to avoid any drifting or other errors. Since this is difficult to achieve, it is instead recommended that you manually split the sprite sheet into separate images.
There are several ways to do this. The most precise way is to use an online photo editor to automatically split the images and save them as separate files. There are several webpages that do this. Here are a few potential options (in no particular order):
Once you have split the sprite sheet into separate images, you can then load them into your sketch and use them as shown throughout this lesson.