Serial Communication
The following lessons will focus on adding serial communication to our sketches. One of the review assignments will have you add these elements to the completed “Bug Squish!” game or the “Paint App” from the previous chapters, allowing for control of your program from an Arduino. By the time you have completed this section you will have the following:
- A functional program that a user can interact with
- Working sounds that respond to various conditions of the game
- The ability to physically manipulate the computer code through physical means such as a button or sensor.
Before we move on however, there is one more item that needs to be installed on your device. This program helps to control the serial input and output going to P5 to avoid data conflicts with the ret of your computer. Follow the steps below to install this program on your device.
Using P5 Serial Control
P5 Serial Control is a 3rd party application that needs to be installed on your devices in order to allow P5 to interact with devices through the USB port on a computer. In short, the program tells the computer to stop sending/receiving data through a serial port in one program, and use P5 with that serial port. We don’t need to get into the fine details of it here, but know that a USB port can only be utilized for one specific protocol at a time, and Arduino and your web browser will fight over access to the port. This is why people utilizing the arduino web editor needed to install an additional plug-in. Having this tool will save up a lot of headaches in the long run by helping to minimize this conflict.
Download and install
P5 Serial Control for macOS version 1.2 can be downloaded directly from the embedded link, However, it is preferred that you visit the link below in order to download whichever version is the most up-to-date. This page will also include several reference articles and links that may prove helpful.
https://github.com/p5-serial/p5.serialcontrol/releases
Once you follow the install instructions for your device, you can open the application and explore its functionality.
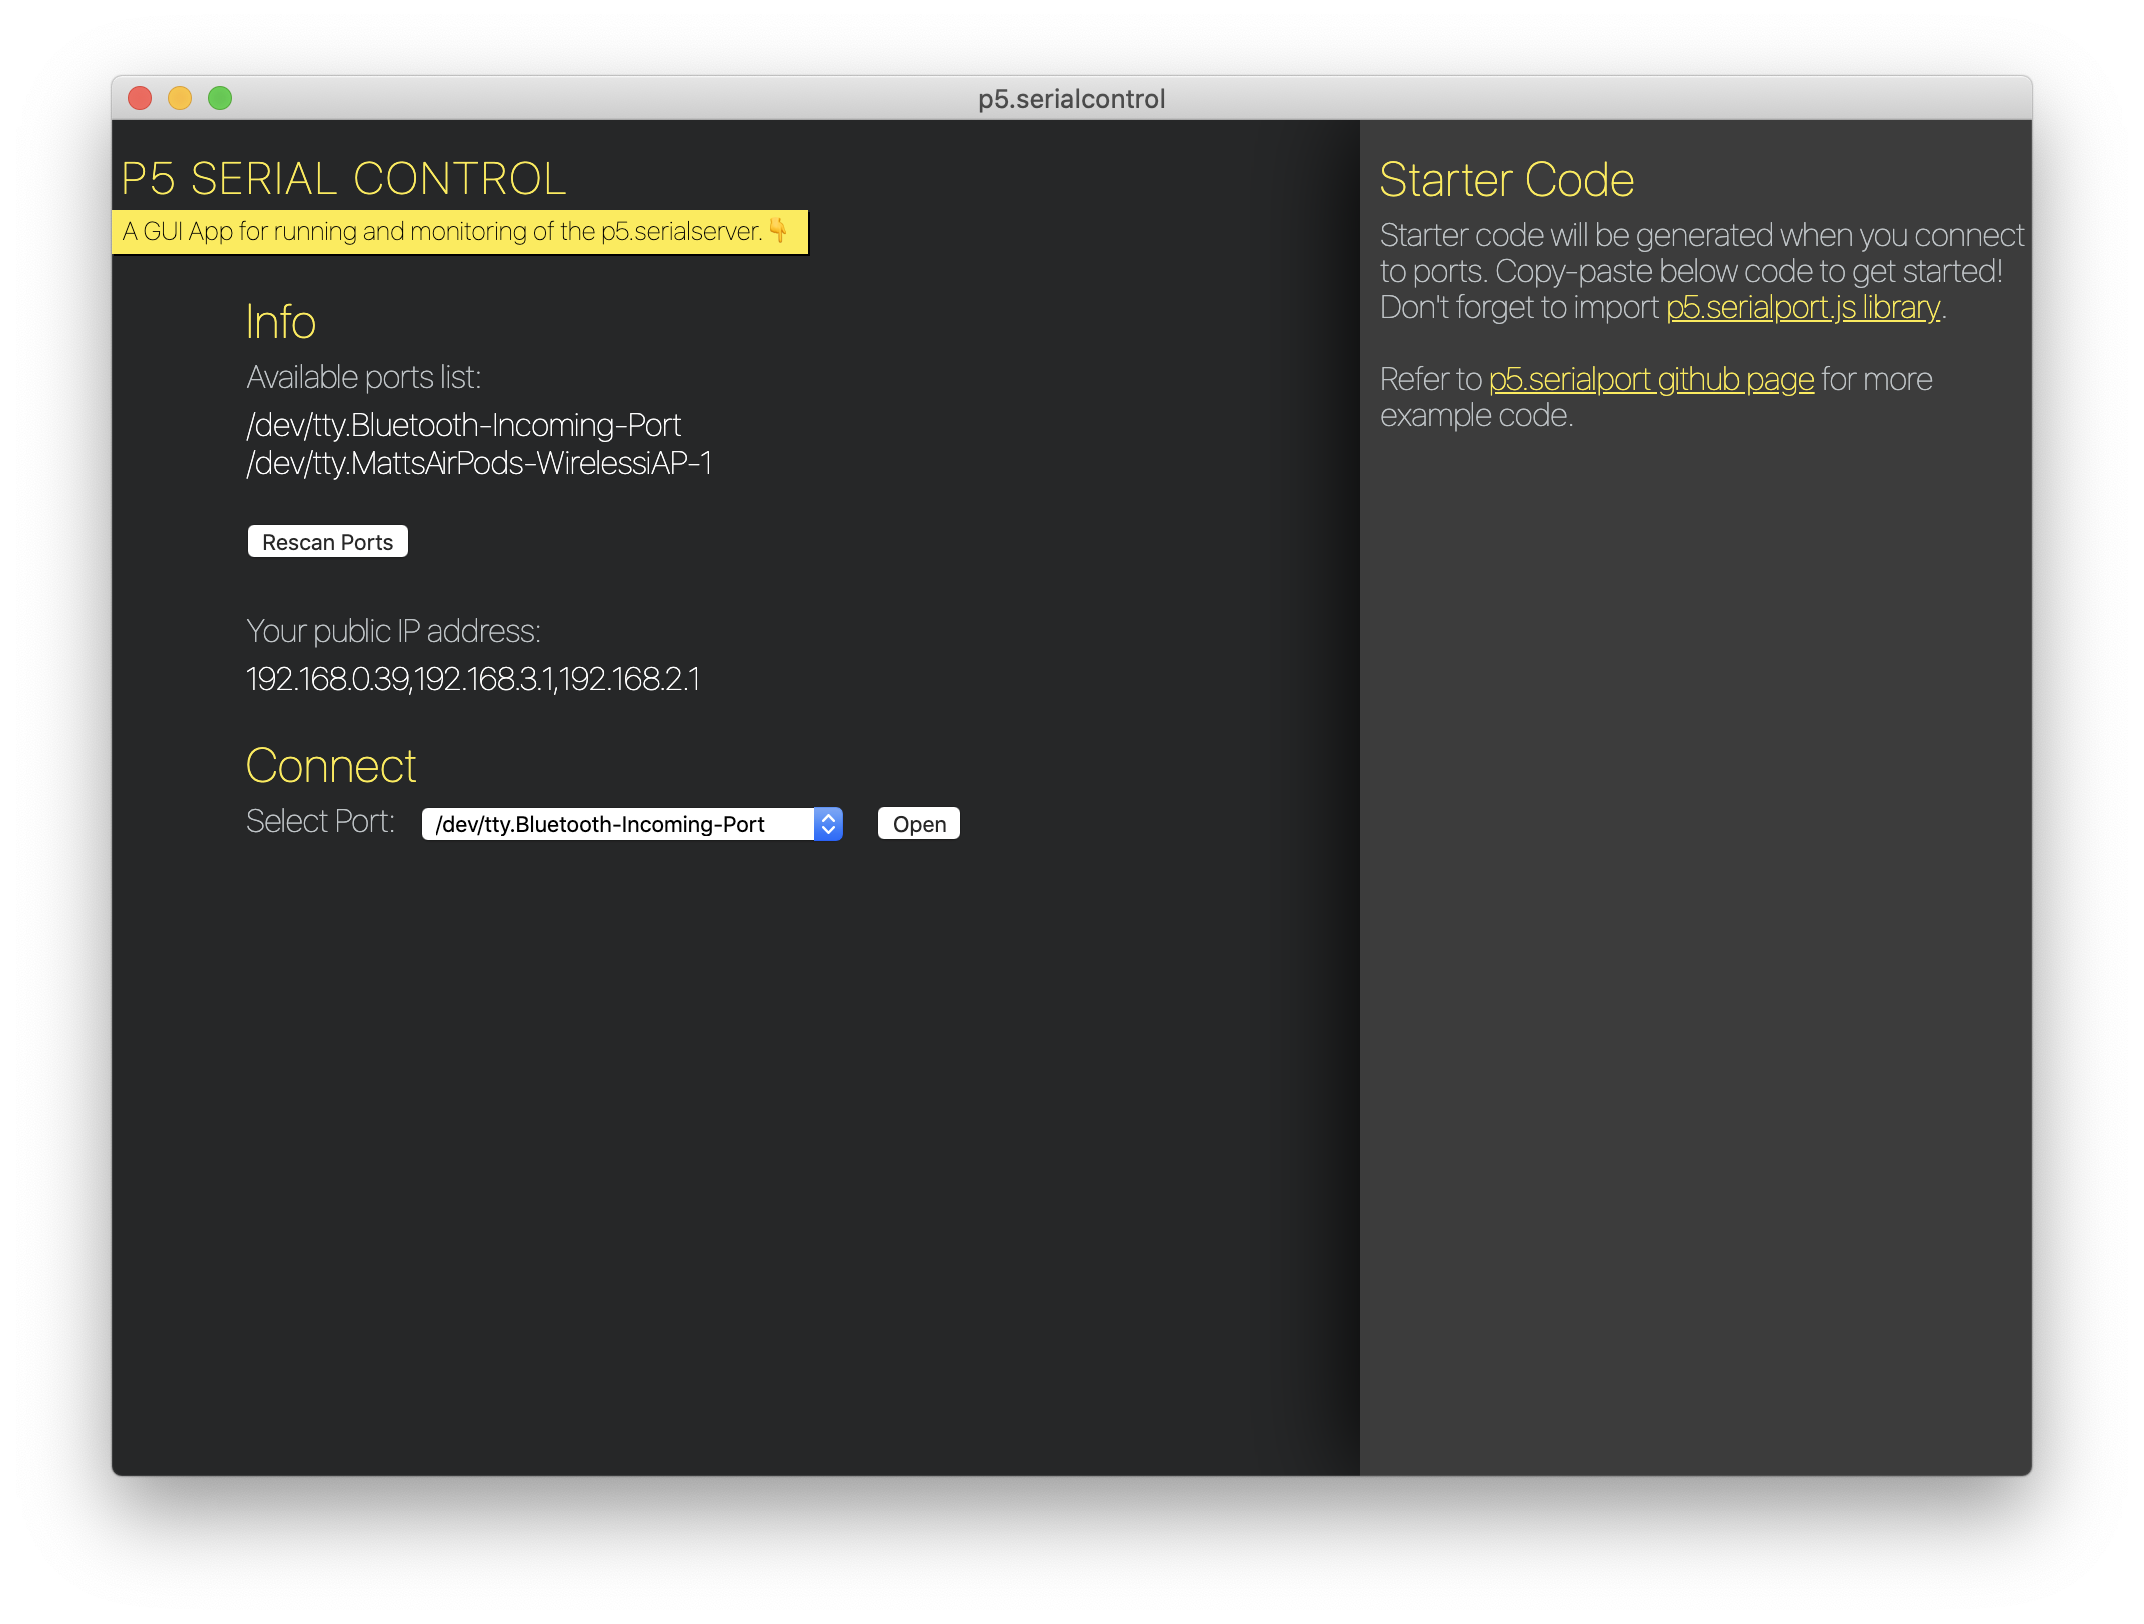
In the default screen you will see a list of serial ports available on your device. If you do not see the one for your arduino, reconnect the USB and click the rescan button. This port will generally look like this:
//on apple devices
/dev/cu.usbmodem1462301

//on windows devices
/COM3
Only the numbers that identify the port will vary from device to device, and port to port. If you disconnect your Arduino and reconnect it to a different USB port when working on the codes in this unit, you will have to close the original port, select the new one, and then open it before te code will work again.
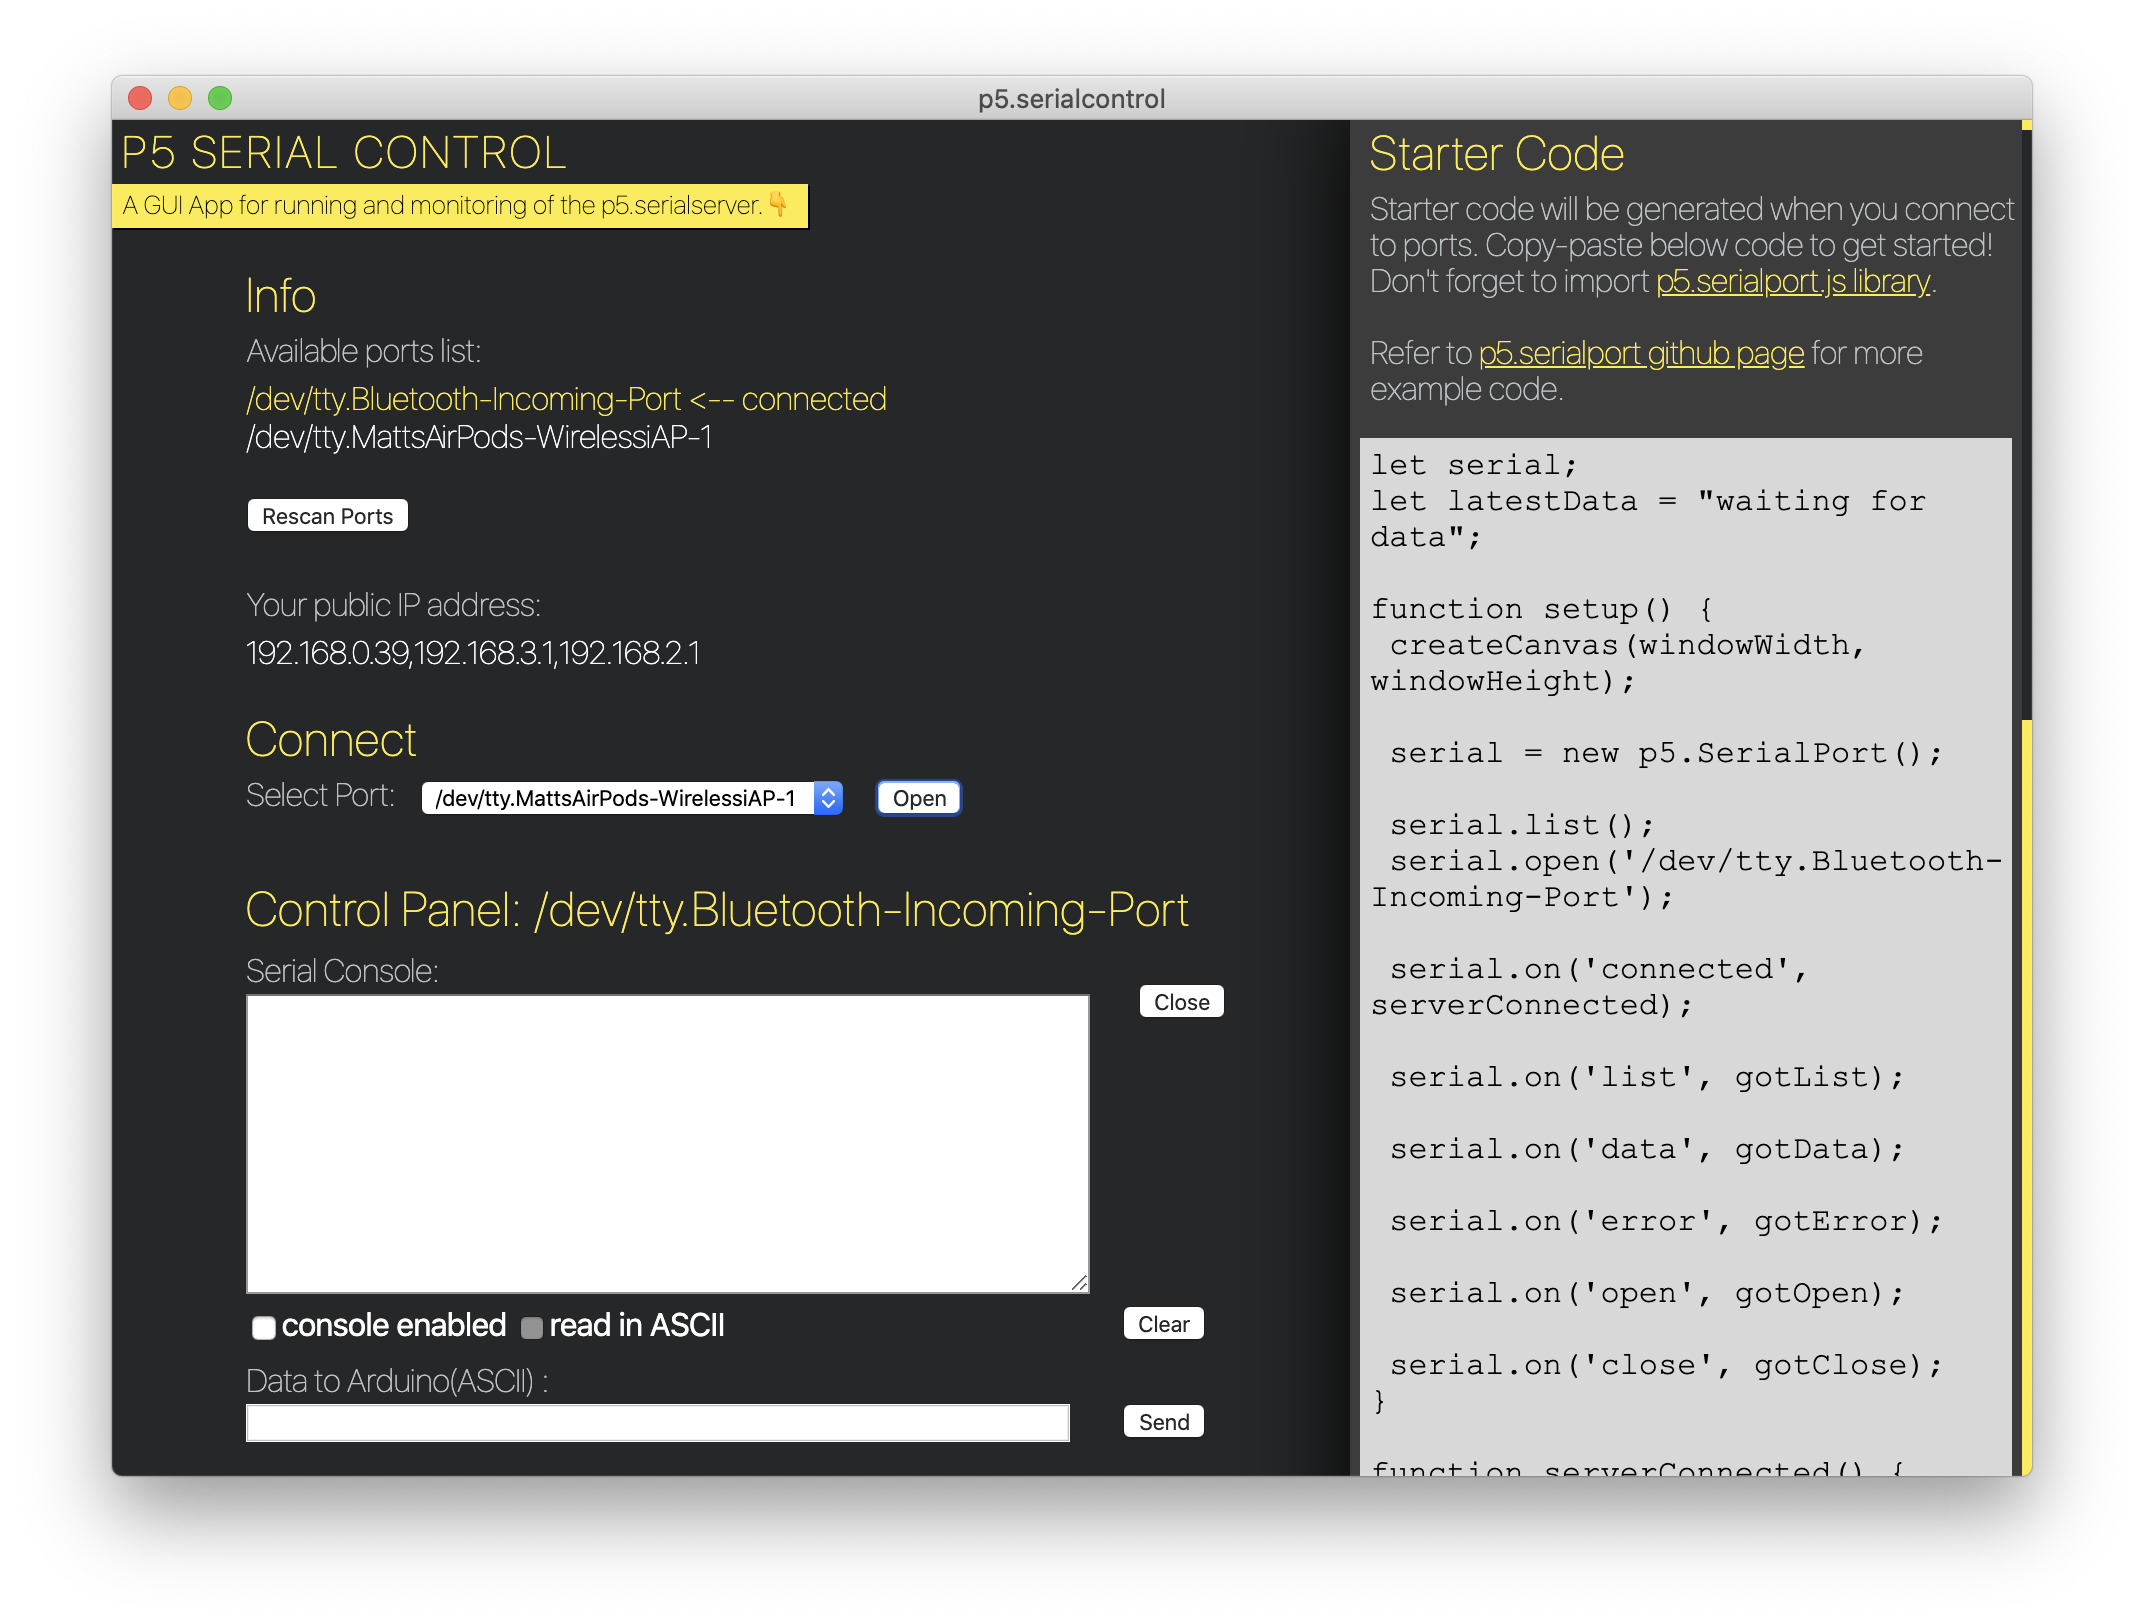
Once you select the correct serial port from the dropdown menu and click on the open button, you will see several new things pop up. There are now windows that you can use to send serial messages through the selected port in order to ensure that they are connected, as well as a box of code that appears on the right side of the screen. This code can be useful for generating your own projects from scratch, so it may be worth it to save the code you your P5 account. However, for this unit, the authors of this course have developed a starting template that will handle the majority of the items handled in this code in the background!
Practice Time!
This isn’t as much of a practice activity as it is a thought experiment. A USB port is similar to a parking space; in concept. When a person pulls into a parking space, they have claimed that location for their use. They can access the various elements around them, stay for how long they need, then leave. Many parking spaces also have unique ID numbers for various reasons.
A USB port functions the same way. A device can connect to a port where it can communicate with the parts of the computer it has permission to access, until the user disconnects the USB device. Much like a numbered parking space, we have seen that each USB port on a computer has a unique ID. This is the ID that is listed in the Serial Control app. By using this ID in our code, we can tell the code to specifically communicate with whatever happens to be connected to that port.
It is also important to know that like a real-life parking space, you cannot connect a device to a port that is currently being used. You cannot park where someone else is already parked. As we will see later on, that is where using this program will com ein handy. It will close any connections between your arduino port and the computer, then open it up for P5 and the web-browser to connect to.
Final thoughts: If a USB port is like a parking space, what would a USB Hub with multiple ports be similar to?