Arduino Setup
In order to complete the assignments for the remainder of this course, Arduino must first be setup on your computer. This program is available for free both as a web-editor and stand alone program. You can go to this webpage to see how to install the web editor on your specific device. If possible, it in a good idea to visit this page to download and install the offline application. This way you can code without relying on the internet connection or Arduino’s servers.
Keep in mind that you may be required to take pictures and videos of your assignments from this section onward as a method of recording and submitting your functional hardware and circuit boards.
Once you have downloaded the software, follow the steps below to make sure everything is ready to go.
- Install Arduino Create Agent for your Browser (web editor versions only)
- Make sure your Arduino board is connected to the computer via USB.
- Go to examples -> Built in -> 01.Basics -> Blink and load the file into the editor
- Choose your Board and Serial:
- In the web editor there is a dropdown menu that will allow you to select your serial port and arduino board model. Make sure these match with the hard ware you are using or else you will be unable to load your sketches.
- In the application this same menu can be reached through Tools -> Board and Tools -> Port.
- These values should be filled automatically, but it is a good practice to double check to make sure that everything is working properly.
- If you have more than one option for the serial ports, start with the default selected option. if you are unable to load your sketch, then work your way through the list of available options until one is able to communicate.
- Click the upload button to send your sketch to the board.
- This process will first verify that the code is free of errors and then send your sketch to the Arduino.
- This process will overwrite whatever is previously saved to the Arduino
- Once the files have been uploaded and communication between the board and computer has been established, you should see a (usually) blue LED that is built into the Arduino board begin to blink in 1 second intervals.
Below is a video of what your board should look like once the steps have all been followed
Once this works, you are ready to go forward. However, there are a few things we need to go over before we can start safely building electrical circuits.
Parts of the Arduino
Below is a labeled picture of the Arduino Uno board. This is one of the more popular Arduino boards available and is the one that this course is designed for. Other boards may be used, however changes to the information given in the upcoming chapters may need to be altered to match the specifications of the new board.
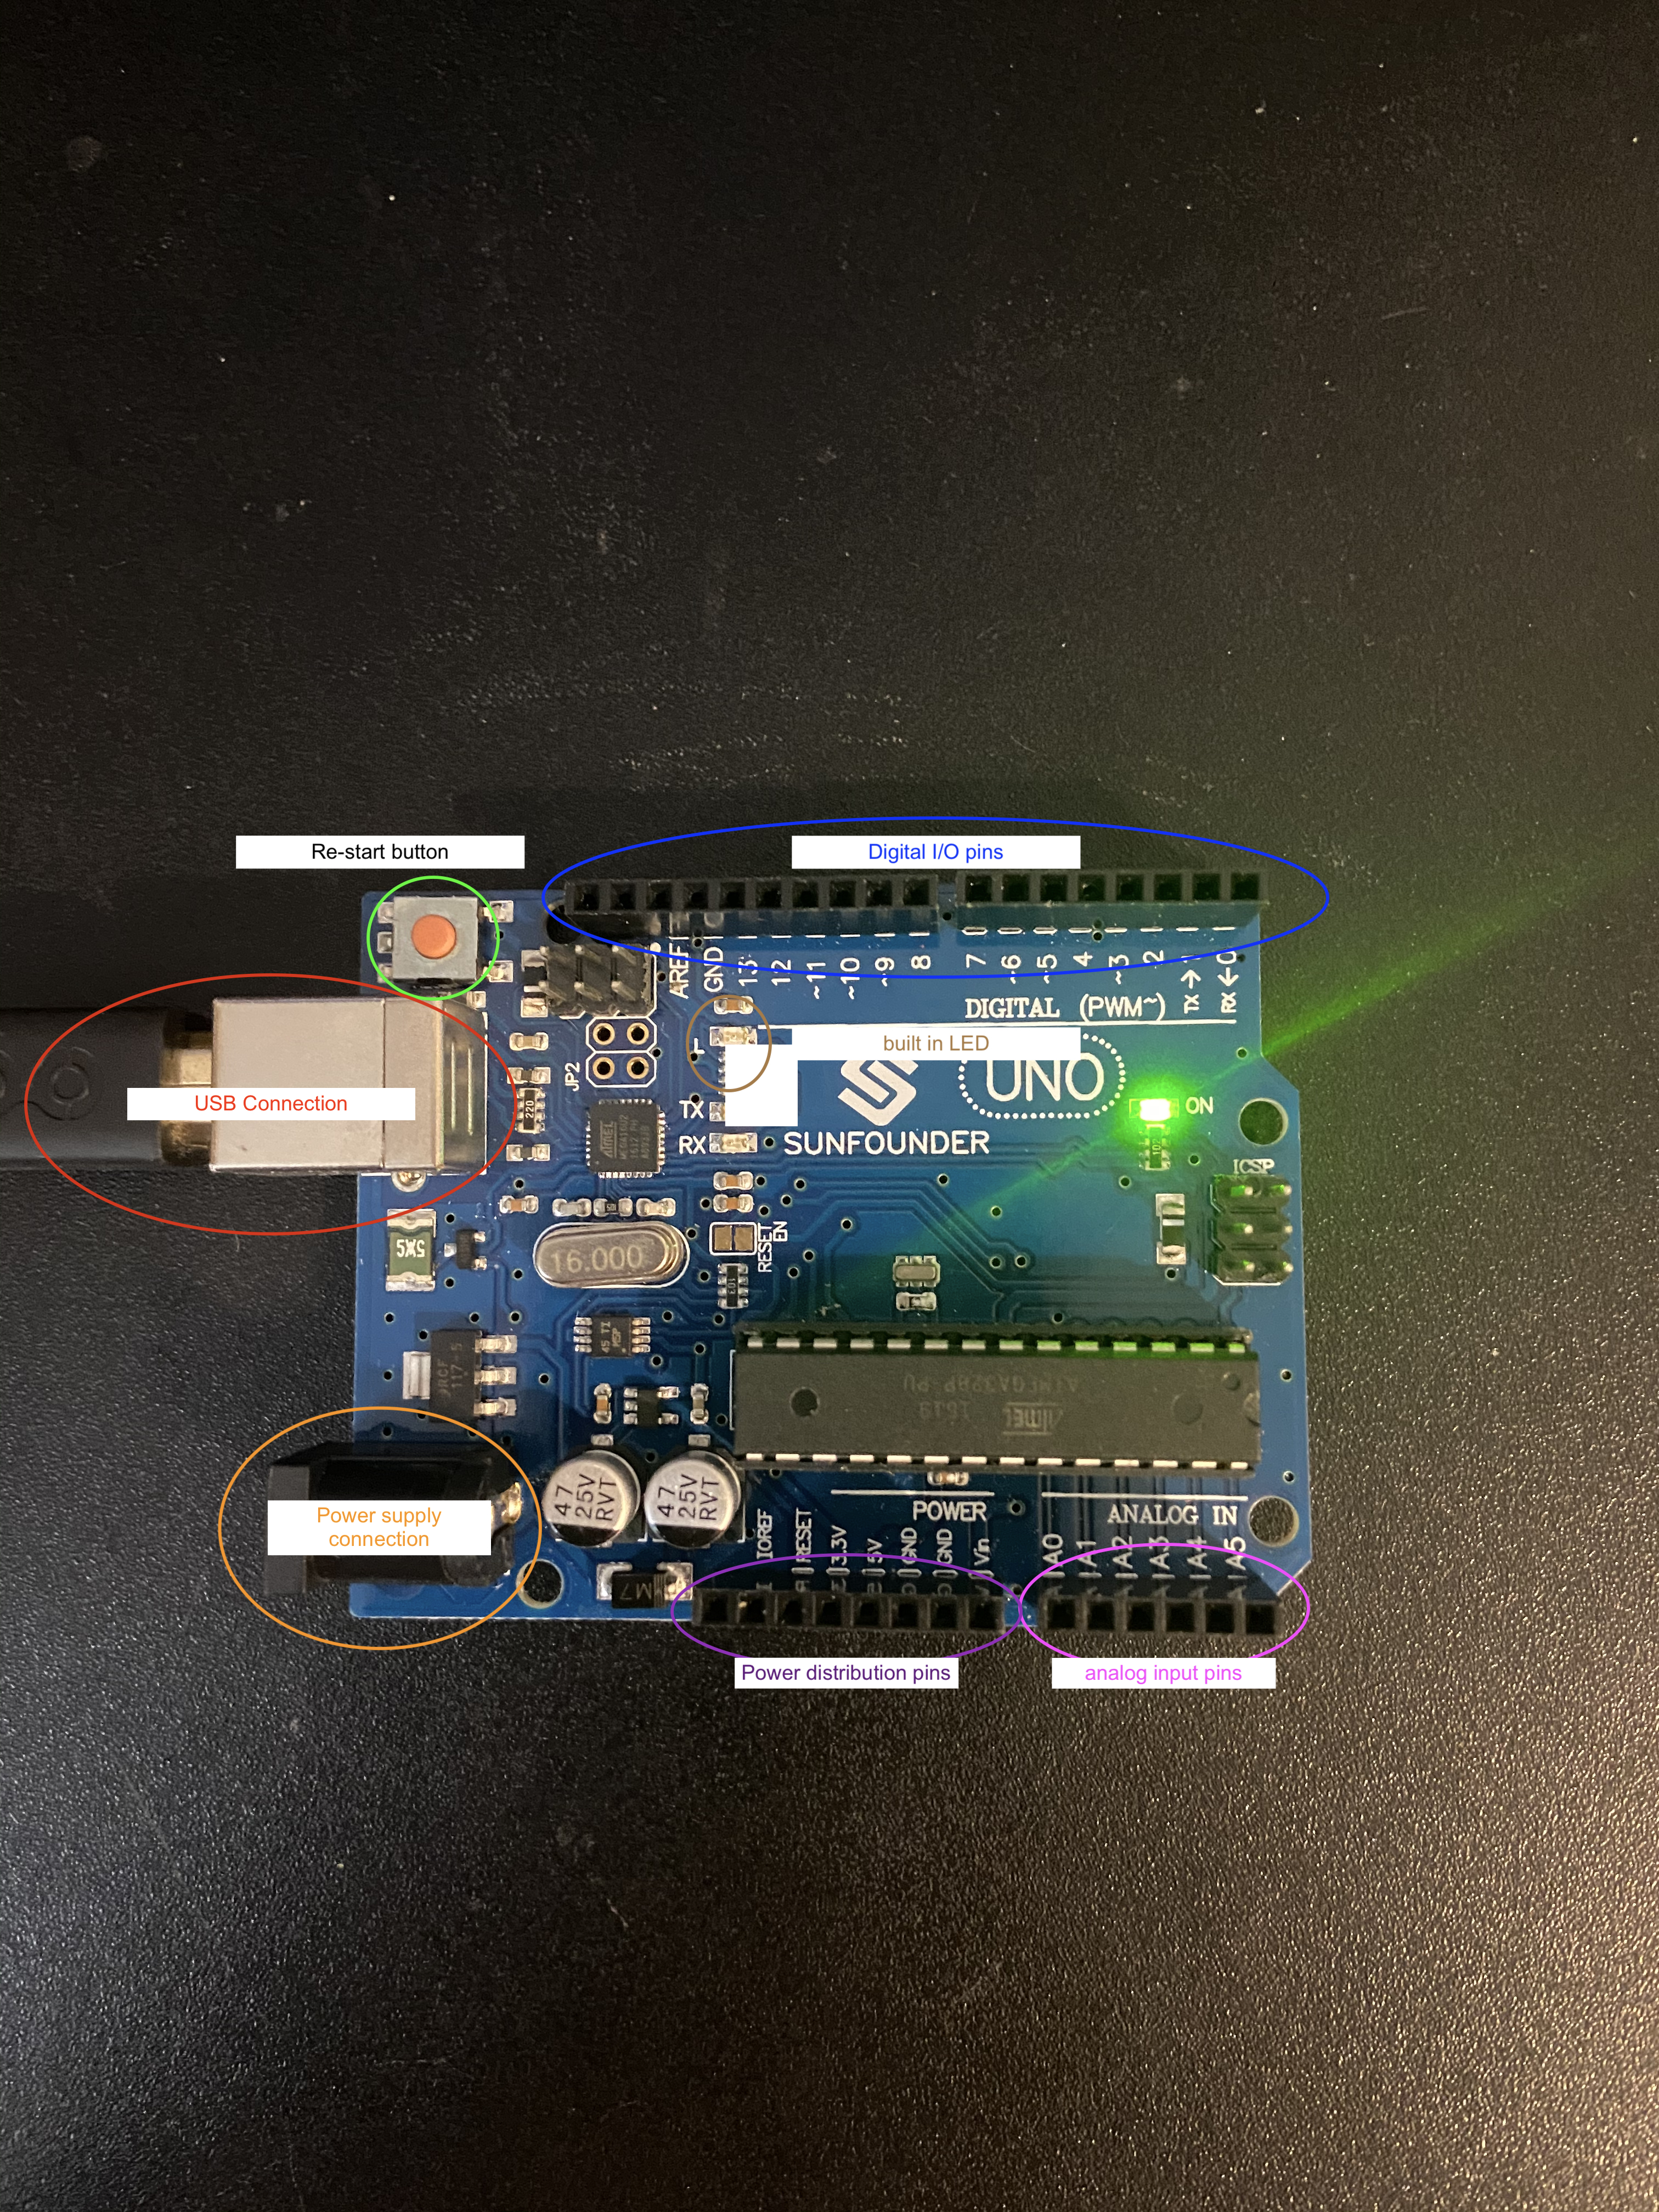
The items labeled are main items that we will interact with during this course. Other items on the board include capacitors, small resistors, and the main CPU located in the middle of the board, but we will not directly interact with those elements.
Keep in min that pressing the restart code will turn the arduino off and on again. Be sure not to press it while you are writing code to the arduino to avoid data corruption.